A Doom Ride-Along: Understanding 2.5D Rendering
I’ve been reading Fabien Sanglard’s fabulous Game Engine Black Book: DOOM. What makes it such a joy is that it isn’t only engine internals — mixed in is computer history, hardware, and the odd wacky anecdote.
To really follow it, I felt like I needed to write some code to grasp some of the concepts. Chief among them is the rendering engine. The geometry doesn’t come from free-form meshes but rather a 2D map that’s projected onto a 3D space, hence the term ‘2.5D’. The book doesn’t go into rendering end-to-end but there are tonnes of other companion resources to choose from. In my case, I followed this fabulous tutorial by 3DSage.
Written here is my attempt to explain to myself how it all works.
If you’ve glanced through this post already, you’ll have noticed the snippets are written in Ruby. Yes, that looks an unnatural choice for someone writing anything graphics related, and I can explain!
Ruby can now be compiled to native executables. This is thanks to Spinel, the latest project from Ruby creator, Matz. Spinel parses Ruby, emits C, and then compiles the C to a native executable. The neat thing about Spinel is that you can use native libraries like SDL for graphics. I’ve been wanting to try Spinel for a while now, and it’s been delightful. There are a few quirks and features of Ruby that are not available, but overall I’m surprised how well it just works.
Step 0 - 2D Map Space
To make things easy, we think in 2D first. We define the world as a top-down map. For the purpose of this example we’re just going to work with the player and a single wall. The player is situated using x, y coordinates, and there’s an ‘a’ value which represents which way the player is facing.
player = { x: 70, y: -110, z: 20, a: 0, l: 0 }

WALL_X  = 40
WALL_Y1 = 10
WALL_Y2 = 290

COS_TABLE = []
SIN_TABLE = []
for i in 0..360
  COS_TABLE[i] = Math.cos(i * Math::PI / 180)
  SIN_TABLE[i] = Math.sin(i * Math::PI / 180)
end
At start, the player is facing 0 degrees (north). We also have ‘z’ and ‘l’; these you can think of as eye height and pitch, but that’s 3D stuff that we get into later. In the code above you can see tables for cos and sin. These are precalculated so we can work in degrees e.g. we store player rotation in 0..360.
This is the map with the player and the wall. The player is facing north (a=0). The wall is at (40,10) to (40,290).
Step 1 - Player relative map space
In game, it feels like the player is moving around the world, but from a rendering perspective we’re moving the world around the player.
One of the first things to do is figure out where the wall corners are relative to the player on the map.
x1 = WALL_X - player[:x]
y1 = WALL_Y1 - player[:y]
x2 = WALL_X - player[:x]
y2 = WALL_Y2 - player[:y]
We’re still in 2d space so you’ll notice the x1 and x2 are the same value. The initial coordinates are set to x1= 40-70 =-30 and x2= 40-70 = -30. As the player moves in the game, we’ll update these values.
Step 2 - Rotate the world around the player
The mountain goes to Mohammed.
The player’s angle also has a bearing on the wall’s coordinates. As the player turns we rotate the world around the player. Multiplying by the cosine and sine of the player’s angle gives us view specific coordinates.
# wx0, wy0: first corner in view space (wx = side, wy = forward)
wx0 = x1 * COS_TABLE[player[:a]] - y1 * SIN_TABLE[player[:a]]
wy0 = y1 * COS_TABLE[player[:a]] + x1 * SIN_TABLE[player[:a]]

wx1 = x2 * COS_TABLE[player[:a]] - y2 * SIN_TABLE[player[:a]]
wy1 = y2 * COS_TABLE[player[:a]] + x2 * SIN_TABLE[player[:a]]
At the initial position, y1 = 10 - (-110) = 120 and y2 = 400. With a = 0 (cos is 1, sin is 0), wx0 = -30, wy0 = 120, wx1 = -30, and wy1 = 400. The rotation leaves these unchanged at 0 degrees.
Turn a little either way and the wall swings around the player in view space:
If the player rotates to −10 degrees, the corners land near wx0, wy0 = (-9, 123) and wx1, wy1 = (40, 399). At +10 degrees they go the other way: approximately wx0, wy0 = (-50, 113) and wx1, wy1 = (-99, 389).
So far so good, we have player relative map space, but we’re still in 2d land.
Step 3 - Calculate vertical position
In order to move into 3D land and project to the screen, we need some Z values. Rather like we did with the wall’s X and Y coordinates, we start by calculating values that are based on the player’s view.
wz0 = WALL_Z1 - player[:z] + ((player[:l] * wy0) / 32.0)
wz1 = WALL_Z1 - player[:z] + ((player[:l] * wy1) / 32.0)
The first part of the calculation is determining the wall’s Z value relative to the player’s eye level. WALL_Z1 is the bottom of the wall. Subtracting from the player’s eye level player[:z] gives you the edge relative to the player’s eye level.
The wy is used to represent depth. This value is multiplied by the player’s pitch player[:l]. If we’re looking straight ahead, l is 0 and there is no pitch correction. If we’re looking up or down, the wz value is adjusted by l.
Further points (ie larger wy values) are affected more by pitch than closer points. The division by 32 is just a number to help control sensitivity of the pitch.
One thing that sunk my understanding of this at first was thinking of depth as distance! Try to read it as how forward the point is along the player’s view. In the diagram above this is the vertical line from the player.
Step 4 - Perspective projection
We now have the following values:
- wx tells us how far left or right of centre
- wy tells us how far in front (depth)
- wz tells us how far above or below the player’s eye level
We now use all these values to calculate screen space coordinates.
PROJECTION_SCALE = 200
sx0 = wx0 * PROJECTION_SCALE / wy0 + HALF_SW
sy0 = -wz0 * PROJECTION_SCALE / wy0 + HALF_SH

sx1 = wx1 * PROJECTION_SCALE / wy1 + HALF_SW
sy1 = -wz1 * PROJECTION_SCALE / wy1 + HALF_SH
You’ll notice here we use a few other values, PROJECTION_SCALE, HALF_SW and HALF_SH. The PROJECTION_SCALE is a number that helps us control the perspective. PROJECTION_SCALE acts like focal length: larger values zoom in the view, whereas smaller values show more of the scene.
We negate wz when writing screen Y because the camera has Y-up (floor below the eye is negative) while the screen has Y-down (zero is the top of the window). Without that minus, the floor line would appear in the top half of the view.
The HALF_SW and HALF_SH values are half width and half height of the screen. This is used to shift the origin to the centre of the screen (rather than the top left corner).
The main thing that we are doing here is dividing X and Z values by depth. Points farther away are scaled down relative to depth, so they appear smaller and converge on the centre of the screen. This provides the perspective effect of far things looking smaller than close things.
The divide by depth step is how we translate from player-relative space into screen space! Here’s how it looks:
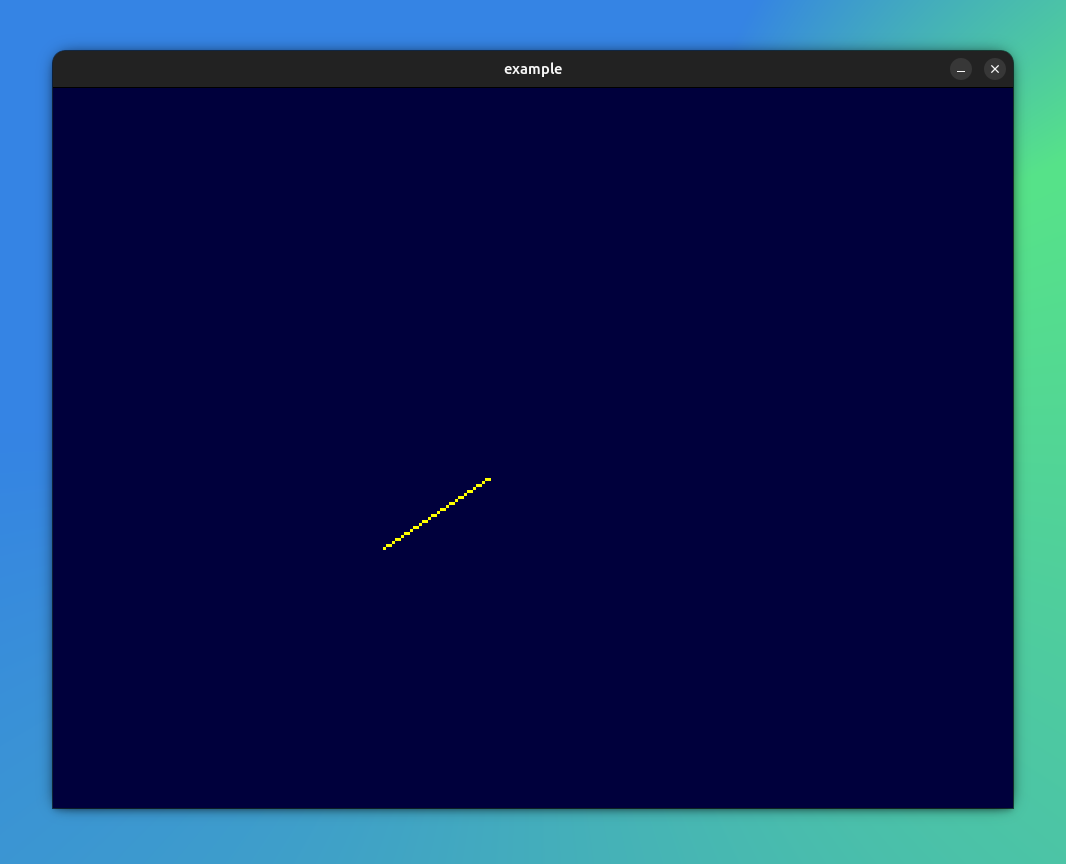
So far it’s just a single line, but if you can draw a single line, you can draw two. The only thing that’s really different is the wz values. Put together it looks like this:
wz0 = WALL_Z1 - player[:z] + ((player[:l] * wy0) / 32.0)
wz1 = WALL_Z1 - player[:z] + ((player[:l] * wy1) / 32.0)
wz2 = wz0 + (WALL_Z2 - WALL_Z1)
wz3 = wz1 + (WALL_Z2 - WALL_Z1)

sx0 = wx0 * PROJECTION_SCALE / wy0 + HALF_SW
sy0 = -wz0 * PROJECTION_SCALE / wy0 + HALF_SH
sx1 = wx1 * PROJECTION_SCALE / wy1 + HALF_SW
sy1 = -wz1 * PROJECTION_SCALE / wy1 + HALF_SH

sx2 = wx0 * PROJECTION_SCALE / wy0 + HALF_SW
sy2 = -wz2 * PROJECTION_SCALE / wy0 + HALF_SH
sx3 = wx1 * PROJECTION_SCALE / wy1 + HALF_SW
sy3 = -wz3 * PROJECTION_SCALE / wy1 + HALF_SH

draw_line(r, sx0, sx1, sy0, sy1)
draw_line(r, sx2, sx3, sy2, sy3)
If you want to see the full code and try it out yourself, you can find a gist with the code here. If you run it and move around a bit, you’ll see something like this:
Step 5 - Draw the rest of the owl
That’s the meat of the rendering process. That example code is pretty limited, and if you move into certain positions you’ll probably get a divide by zero error. If you wanted to pick up where that example left off, you could start by adding some clipping to prevent drawing lines that are off screen.
That’s what I’ve been doing, and, you can probably guess from the video my next step is to figure out drawing order!